Install Python
Python is one of the most popular programming languages out there. I often use Python in our daily work to clean up and analyze data. This tutorial will show you my favorite way to install Python and manage its libraries. There are a few different ways to get Python on your computer, but this is the method I recommend for keeping things simple yet flexible.
Installing python
One popular method for installing and managing Python is Anaconda. Anaconda provides a comprehensive distribution that includes Python, numerous scientific libraries, and development tools. It also features a graphical user interface (GUI) called Anaconda Navigator, which allows users to manage environments, packages, and applications visually. However, despite its simplicity and user-friendly interface, Anaconda can be quite resource-intensive, installing many programs and libraries that often go unused.
This is why I prefer Miniconda, a minimalist installer for conda. It’s a streamlined version of Anaconda that includes only the essentials: conda, Python, their dependencies, and a handful of useful packages. This approach gives users more control over their Python environment and consumes less disk space.
But is Miniconda my top choice? Not quite.
While Anaconda and Miniconda are widely adopted (and I’ve used them in the past), I favor a third option: Miniforge. Miniforge is essentially Miniconda with two significant advantages:
It uses conda-forge as the default package channel: Conda-forge prioritizes well-maintained packages that follow best practices, establishing itself as a trustworthy source for Python packages. Its community-driven nature ensures a diverse and up-to-date package ecosystem, making it an invaluable resource for Python developers.
It comes bundled with mamba: Mamba is a re-implementation of the conda package manager in C++. It provides faster dependency resolution and package installation compared to conda, significantly speeding up environment creation and management tasks.
Sounds cool right? well for not it may not make too much sense but we will see later why this is cool. Let’s install Miniforge now.
Miniforge
Ok, lead to Miniforge and download the version right for your system. And start the installation process:
There are multiple version you can download. The one you should download is at the end of the page: Miniforge3
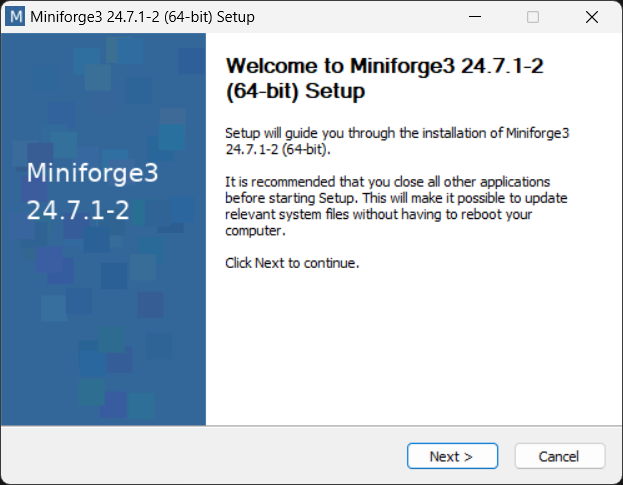
Once you press next and accept the conditions the installation program will ask you few questions like so:
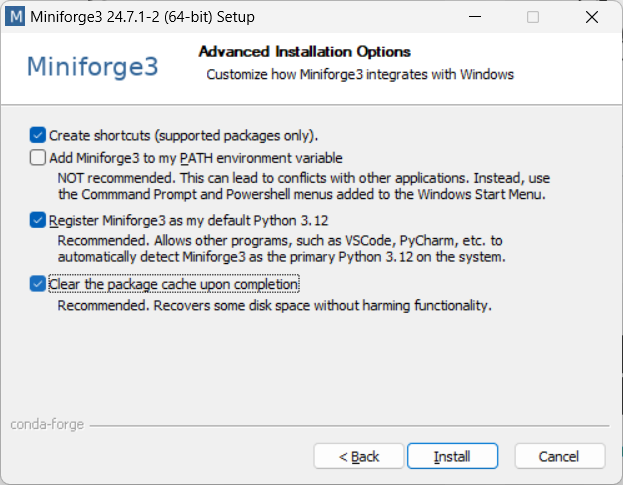
I suggest to keep the same options I selected but feel free to change them if you know what you are doing.
Perfect press Install and wait for few minutes for the process to finish!! You are done!! What you should have on your system now is this icon:
Now I will show you how to use it!!
Use the Miniforge Prompt
Now that you have Miniforge installed and can access its prompt, let’s explore how to use it effectively. Our first step will be to create a new virtual environment. What’s a virtual environment you ask?? Well python has different versions. Sometimes when we create scripts we needs to run a specific version of python because some of our packages may rely on older version of python or we have conflicting dependencies with other packages. Virtual environments keep these dependencies in separate “sandboxes” so you can switch between both applications easily and get them running.
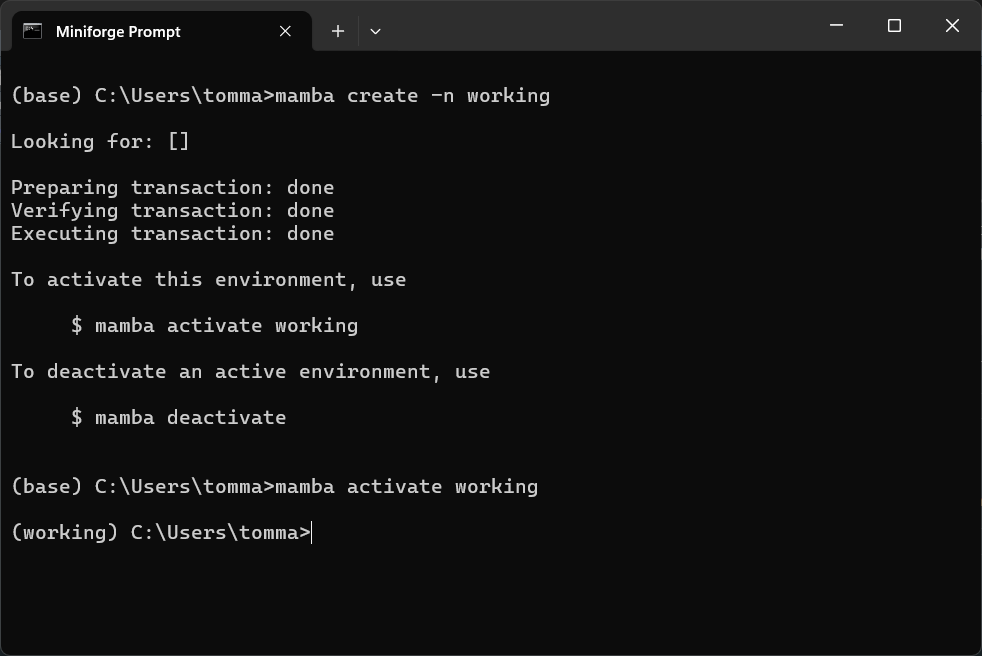
When you open Miniforge, you’ll be presented with a terminal prompt. To create your first environment, simply enter the following command:
mamba create -n workingThis will create a new environment called (-n) working.
Once the environment is created, the prompt will inform you that to work in this specific environment, you need to activate it by typing:
mamba activate workingYou’ll notice the prompt changes from (base) to (working), indicating which environment is currently active. Now that you’re in the correct environment, you can install the Python packages you need using mamba install followed by the package name. For example:
mamba install pandasyou can install multiple packages at once by adding them one after the other e.g. mamba install pandas numpy matplotlib
After a brief moment, the prompt will download the package(s) and their dependencies. It may ask you to confirm the installation by pressing y. A few seconds later, your chosen libraries will be ready for use! This process ensures that you have a clean, isolated environment with exactly the packages you need for your project. Perfect!
In Miniforge, you have the flexibility to use both mamba and conda commands. In fact, for most operations like creating environments, activating them, and managing your setup, you can use these commands interchangeably. For example:
 mamba create -n myenv
 # or
 conda create -n myenv

 mamba activate myenv
 # or
 conda activate myenv
Both will work similarly. However, when it comes to installing packages, we recommend using mamba. The reason is simple: mamba is significantly faster at resolving dependencies and installing packages. So, for the best performance, especially with complex environments or large packages, use:
mamba install package_namePip
While conda-forge is an amazing channel to retrieve your packages not all of them are there…In such cases, pip, probably the most renowned Python package manager, can come to the rescue. You might already be aware of pip, versatility for installing and manage packages in Python. Let’s consider numpy, an exceptional package for array manipulation. With pip, installation is a breeze. Simply use the following command:
pip install numpyIDEs
Ok we now have a python environment…but how can we use it??? well you could type python in the miniforge prompt and tyoy you script there… Let’s not be ridiculous we need a proper IDE (An IDE is software that combines commonly used developer tools into a compact GUI application. It is a combination of tools like a code editor, code compiler, and code debugger with an integrated terminal.)
There are a lot of them around Vs Code, Pycharm, Jupyter Notebooks and many more!! So you can pick and choose the one that oyu like the most or that suits your needs the best. I really like Spyder!
Spyder

Spyder is a powerful scientific environment IDE written in Python. Spyder is designed by and for scientists, engineers and data analysts. It integrates very useful functionalities (variable explorer, plotting, etc.) making it our favorite way to write and run python code.
Command prompt
When you install the full version of Anaconda, it installs Spyder for you. However, Miniforge/Miniconda and do not come with Spyder. Fortunately, they do make it easy to install it. In the Miniforge Prompt activate the environment you want Spyder into and then type following command and press the “enter” key:
mamba install spyderAfter thinking a bit, the Anaconda prompt will prepared a bunch of files to download and ask if you’d like to proceed. Go ahead and type “y” and hit “enter” to proceed.
You now should have new icon of Spyder called Spyder 6 ( “your env name” ). For example :

In case you do not see it…Don’t panic!!! You can always open the miniforge prompt, activate your environment and type spyder. Tada !! done!
.exe
Spyder offers an alternative installation method using a standalone file. Simply download the appropriate installation file for your operating system and run it. This approach may seem advantageous as it allows you to install Spyder IDE once, rather than in each environment. You can then switch between different environments through the graphical user interface.
However, this method isn’t as straightforward as it might appear. Any environment you wish to use with Spyder still requires the spyder-kernel package. When you attempt to use Spyder in an environment lacking the spyder-kernel, it will prompt you to install it. You can do this by running mamba install spyder-kernel in the desired environment.
Ultimately, the choice between installation methods depends on your specific needs and preferences.
Positron

One other IDE that I’ve recently discovered and been enjoying is Positron. Positron is a next-generation data science IDE. It’s still in active development, so some features may not work perfectly or might change in the future. However, it’s now in public beta, which means you’re welcome to give it a try! The interface and functionality of Positron feel like a hybrid between VS Code and RStudio/Spyder. Given its ongoing development, you might prefer to wait for the official release. That said, it’s already quite functional and supports both Python and R, with the ability to switch between multiple environments.
If you have some time, consider trying Positron out. Your experience could be valuable - don’t hesitate to submit bug reports or feature requests to help improve this promising tool.